When getting yourself ready to orchestrate a plastering project, what motions you to be successful when the first trowel or brush stroke happens? Setting the stage for a "PIY" plaster project means creating rituals that work for you.
Whether its one bucket or twenty, establishing good routines will help you avoid unneeded fatigue and give you the repeatable consistency to do the next wall, or the whole house. This blog will focus on how to create good "first stage" to lay the groundwork for your finishes to come.
I love mixing and tinting my own plasters. Its a dance in and of itself. Earthen plasters like American Clay bring the power to your hands...before the troweling begins. Customize your own "Mari-Loma" or "Loma-Lina" batches and tint them with natural pigments as you wish. Experiment away friends! The color, consistency, and quality are up to you. DIY's, you can "MIY" then "PIY"! :)
Along with the power and control you have over customizing your plasters comes a responsibility. When experimenting with colors and textures..keep these points in mind.
- Use a digital scale and record your measurements. This will help ensure repeatable, consistent batches.
- Samples!!! Always make a "batch sample" after your first "scrap sample" to monitor any changes. This is especially helpful to ensure client sign-off and project success. It's always a good idea to make a third one just in case you want to experiment even further with lime washes, tinted sealers, and other artistic effects.
- Be safe! Arm yourself with an N-95 respirator and glasses when working with natural pigments and mixing.
The Mixing Station...Tools and Techniques
How can you go from mixing 5 gallons in 30 min to 20? With the right station and equipment, you'll be standing tall. You might even have enough energy to go for a post-mix skate or run! Over time, I have found some great tools to use for this process. Hint: look no further than your restaurant supply store for some of them!
- 4' wooden spatula is perfect for breaking surface tension that occurs when mixing and is great to use for scraping and blending all those bottom aggregate remnants. It is also a great weapon! (just kidding!)
- Large galvanized trash can is essential! If you are doing larger projects or simply want to ensure color consistency, grab one at your local hardware store before your next gig. I also like to use a smaller basin style one for holding tools while mixing to contain debris.
- 1/2" drill and mud paddle..of course!
- Large plastic measuring cup w/ handle will allow you to get the plaster out of the can with ease.
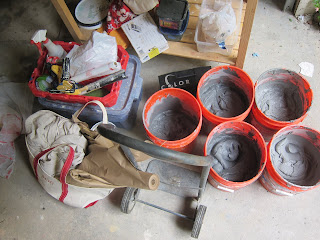
- Hand trucks are great for wheeling those buckets around...in style!
Ergomonics is Queen! Developing good practices will help preserve your energy to "let'er rip" when it comes to troweling.
- Clean buckets! Who wants chips of old red Marittimo with new buttery white Porcelina? Soak your old buckets the night before, then scrub and spray out. The cleaner the start, the crisper the job.
- Use gravity! Those 50 lb bags can be heavy, use a table, truck bed, or the edge of your mixing can to coax the plaster in.
- Develop a pre-job checklist and dedicate one area to collect all your tools and materials. Load up, then treat yourself to a nice carbo-load-up before your job to sustain your energy and keep your outlook sunny!
Finally.....keep falling in love with what you do! Enjoy the process of making the art and the art-making!
"In art, the hand can never execute anything higher than the heart can inspire" - Ralph Waldo Emerson


No comments:
Post a Comment